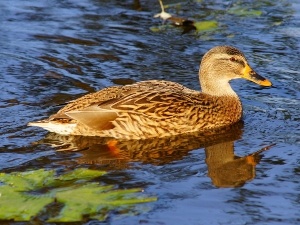
Ducks can become injured, these birds can become injured very easily infact, and some duck injuries can be quite severe.
If your bird develops a very severe injury you’d likely need to splint the bird’s leg to get it better. This article explores how to do that
Table of Contents
How to splint a ducks leg
Splinting is quite a simple process and doing it right can go a long way in helping the injured bird. This is what you need to know about splinting a ducks leg:
Notes before splinting
The number one thing that you should keep in mind before splinting a duck’s leg is to be patient and gentle. You also need to make sure that the bird stays calm throughout this process.
You would need to examine the duck before you splint the bird’s leg. Catch the bird gently, do this as quickly as you can, and don’t let the bird move its leg too much as you try to catch it, or else the injured leg will become further injured.
If you cannot calmly and safely restrain your duck on your own, get help from someone else to help you restrain the bird.
Also, check for signs of shock, dehydration, or stress before splinting, these need to be treated before splinting the bird’s leg. If the bird is cold you’d need to warm it up before splinting the bird’s leg.
How to splint the bird’s leg
If the bird’s leg is injured and there is an open wound on the leg you’d need to tend to the wound as quickly as possible. It is advised that you pluck out the feathers in the area so you can work on the leg easier.
Once the area is clean of feathers you’d need to flush the bird’s leg using a solution of water and Nolvasan or Betadine. This flushing should be done well enough that it removes all the dirt and debris from the bird’s leg.
Measure the length of the bird’s leg and use this measurement to make the bird’s splint.
A leg splint that extends from the bird’s knee to its heel will be appropriate, this will be long enough to immobilize the leg.
The length of the splint should not be too long that it cuts into the bird and should not be too short that it will move out of position.
You can use a material like a kleenex box to create the splint as this is a lightweight yet bendable material. Once you’ve cut the splint to size, curve it so that it can wrap around the bird’s leg.
Create a layer of padding to go between the splint and the bird’s leg. Cut this out to the measurements of the splint and then attach it to the splint on the side that will be against the bird’s leg
Apply this cardboard splint onto the bird’s leg and secure it using pieces of tape. Once you’re confident that the splint is in place you can tape it securely all up and down the bird’s leg.
Tips when splinting the bird’s leg:
Splinting is not a substitute for veterinary care, it is recommended that you rather take the duck straight to the vet once you realize that it is injured.
Splinting can be used as temporary support and comfort for the bird until you can get the bird to the vet.
Using padding between the splint and the bird’s leg is a must, this is done so that the splint doesn’t cut into the bird’s leg or create pressure sores.
It is important to keep your bird relaxed as it recovers from its injury, this will help the bird recover better and keep the bird from becoming more injured.
It’s important to keep an eye on the bird’s leg as it heals. You’d need to check for swelling on the bird’s leg. If the bird’s leg is swelling up then you’d need to redo the splint.
Avoid unnecessarily handling the bird until after splint removal.
If the bird is a songbird then the splint should be kept on the bird’s leg for around 7 days. Medium-sized birds can usually have the splint on for 10 days and larger birds may have to keep the splint on for 3 weeks.
If you enjoyed this article then you may also be interested in other duck related articles. Here are some articles that you may be interested in: Duckling feet turned inward, Duck dragging leg, Duck foot swollen, How to keep ducks safe on a pond

